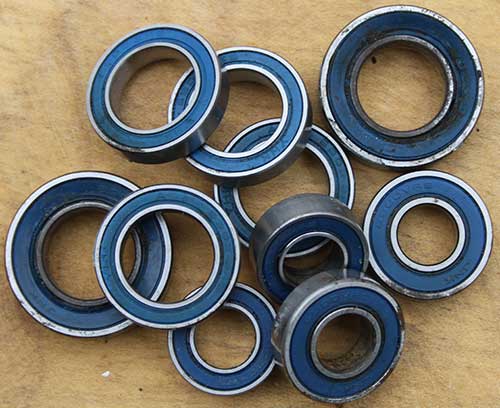
These ten little rings are the suspension bearings from my Giant Anthem X3 (2012 model year)…
Over the last few rides the back-end of the bike has been getting increasingly ‘creaky’ and I was convinced that it was the bottom bracket that needed some attention. But on the last ride, last week, the handling got decidedly questionable – on hard tarmac the rear end started to veer about with a mind of its own, not bad on loose dirt, but disconcerting going fast down the road towards the Fosse Way. A quick check of the rear suspension triangle showed that something was loose, which could only really mean that one or more bearing had come to the end of their lives.
On the basis that one bearing had now failed, it wasn’t unreasonable to assume that others could be following shortly, so a full bearing change seemed sensible.
When it comes to mountain bikes, I quite like to know how they work and how to fix them, as Mombee’s Laws say that you’ll be stuck in the middle of nowhere when a mechanical happens. So as rear suspension maintenance is new to me, this was a perfect opportunity to learn something new.
Removing the SRAM chain set was the first – and unlike Shimano which needs a special tool, an Allen key was all that was required to undo and remove the chain set. Note – the chain was already off and soaking in some white spirit.
There are then two bolts to undo to remove the triangle from the frame – and the rear shock to be undone – which was pretty straight forward, again just Allen keys.. I took loads of photos while I was doing this and the bearing removals, just to be sure that they all went back together properly.
The bearings present a different challenge as these are pressed into the frame – if you are uncertain about how to remove these and/or your tools or workshop are not up to the job, then stop reading now and got take the frame and triangle to your local bike shop! If you make a mess of getting a bearing out, not only will definitely end up at the local bike shop anyway, but you stand a significant risk of damaging your bike permanently.
Fortunately the workshop here at Mombee is pretty well-equipped with a good range of bike tools, a hefty tool box and a good range of semi-industrial clamps and vices that I inherited from dad – what I don’t have is a proper set of bearing pullers, so I took three approaches with getting the bearings out:
1 – using a desk vice to press bearings out. I used a very large socket on one side of the rear triangle, with the frame protected by a cloth, and a small one to push the bearing out.
2 – a hammer. Two of the bearing are in a part of the rear triangle that has sloping sides, so is nigh on impossible to use the vice compression option. However by carefully raising the frame on some woods and again using a small socket and metal rod to provide the purchase on the bearing, it was possible to tap the bearings out. The key here is to ensure that the force applied is going directly through the bearing to ensure it comes out cleanly.
3 – a semi-industrial clamp. I couldn’t get a couple of the bearings into the vice because of their poistion on the frame, so a heavy duty clamp came into play.
Once I’d worked out the best approach for each bearing, they all came out suprisingly easily. I’ve now got thr order in with Veloton for replacement bearings, which should arrive this week, so they can installed – but the bike needs a good wash while it’s in bits first.
NOTE – I’ve said it before, but home maintenance carries some risks, if you’re not happy to work on your bike, then take it to the local bike shop and let them fix it for you!!!


